
1. Register Kit
IMPORTANT: You MUST register your kit’s barcode at www.skintelli.com/go first. This is needed for you to retrieve your results.

2. Wash Face
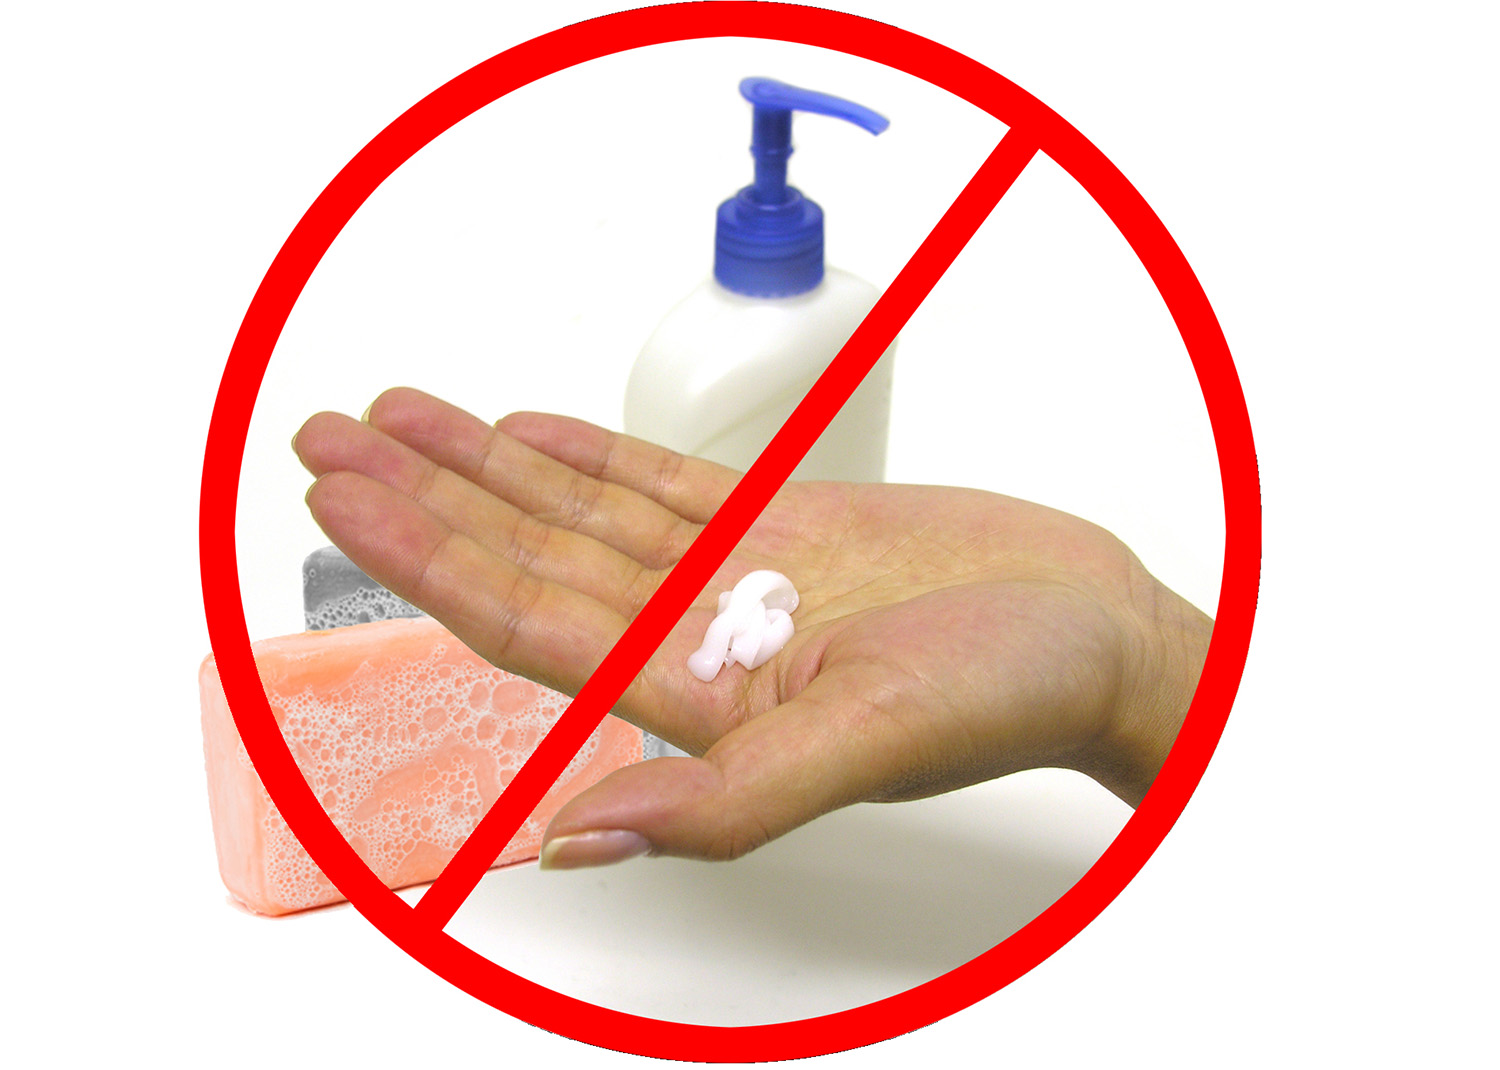
Gently wash your face with water and remove any makeup, debris, lotion/moisturizer, or any other topical products.
3. Wait 4 Hours
Avoid any topical products including moisturizers and makeup on your face for at least 4 hours prior to sampling your skin areas with the kit.
4. Prepare Adhesives
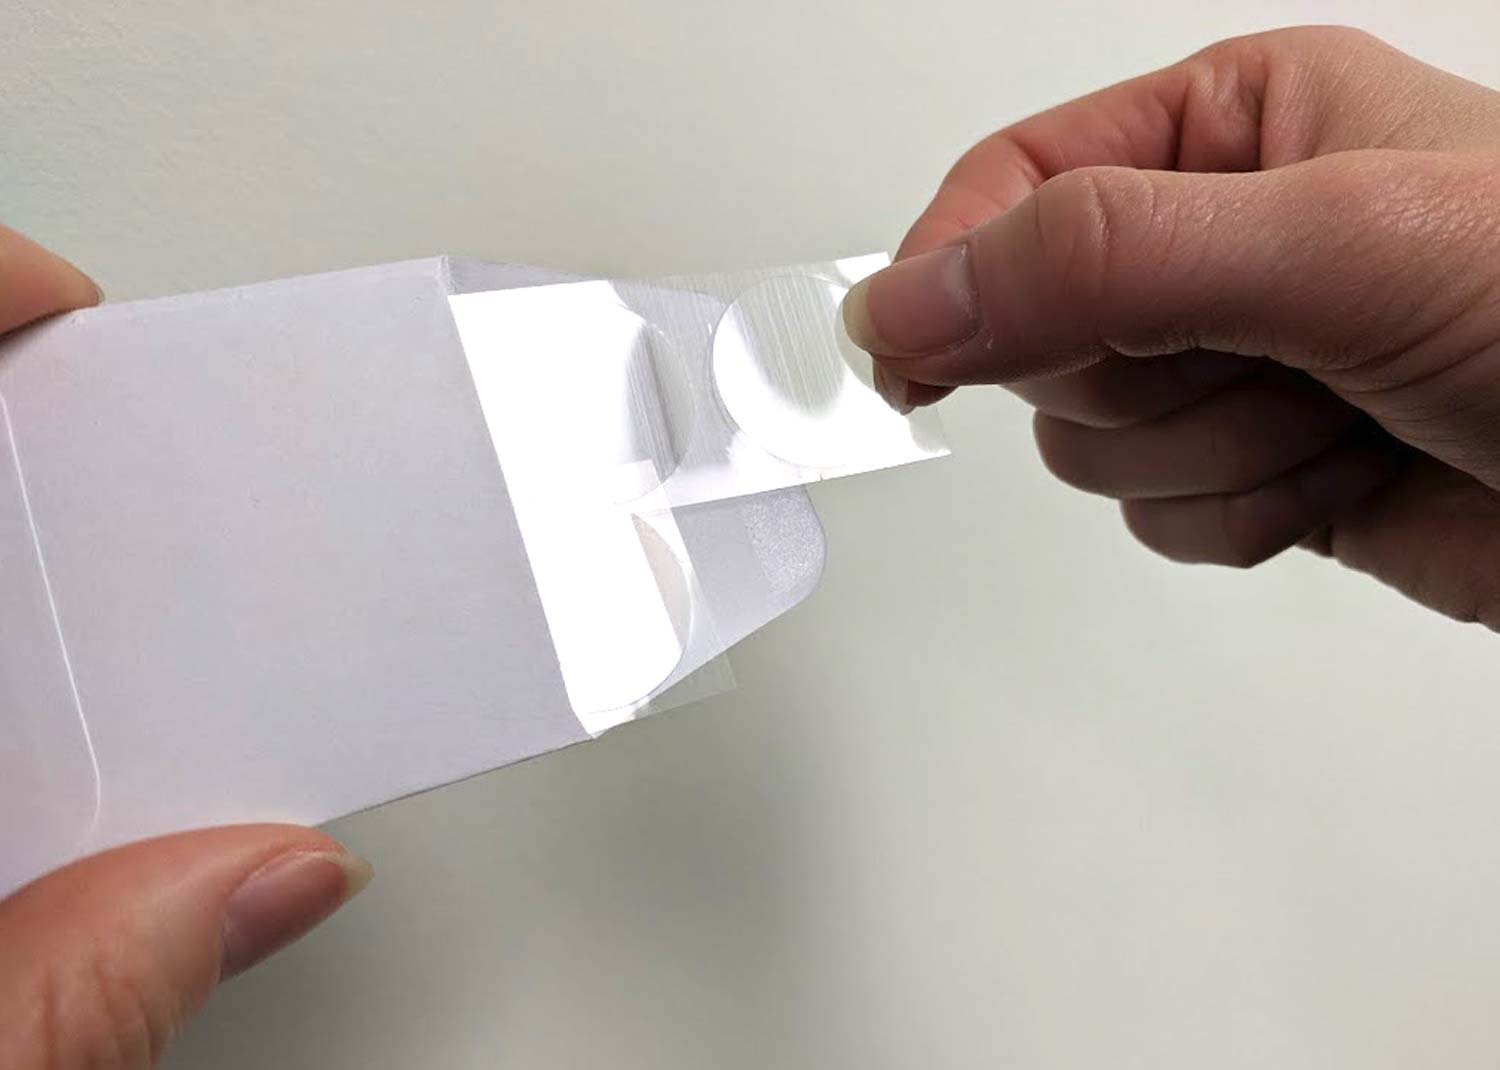
Open the kit box. Wash your hand with soap before handling the collection adhesives (circular tape discs) in the small white envelope. Find a clean surface to work on before peeling the adhesives.
5. Note Sample Areas
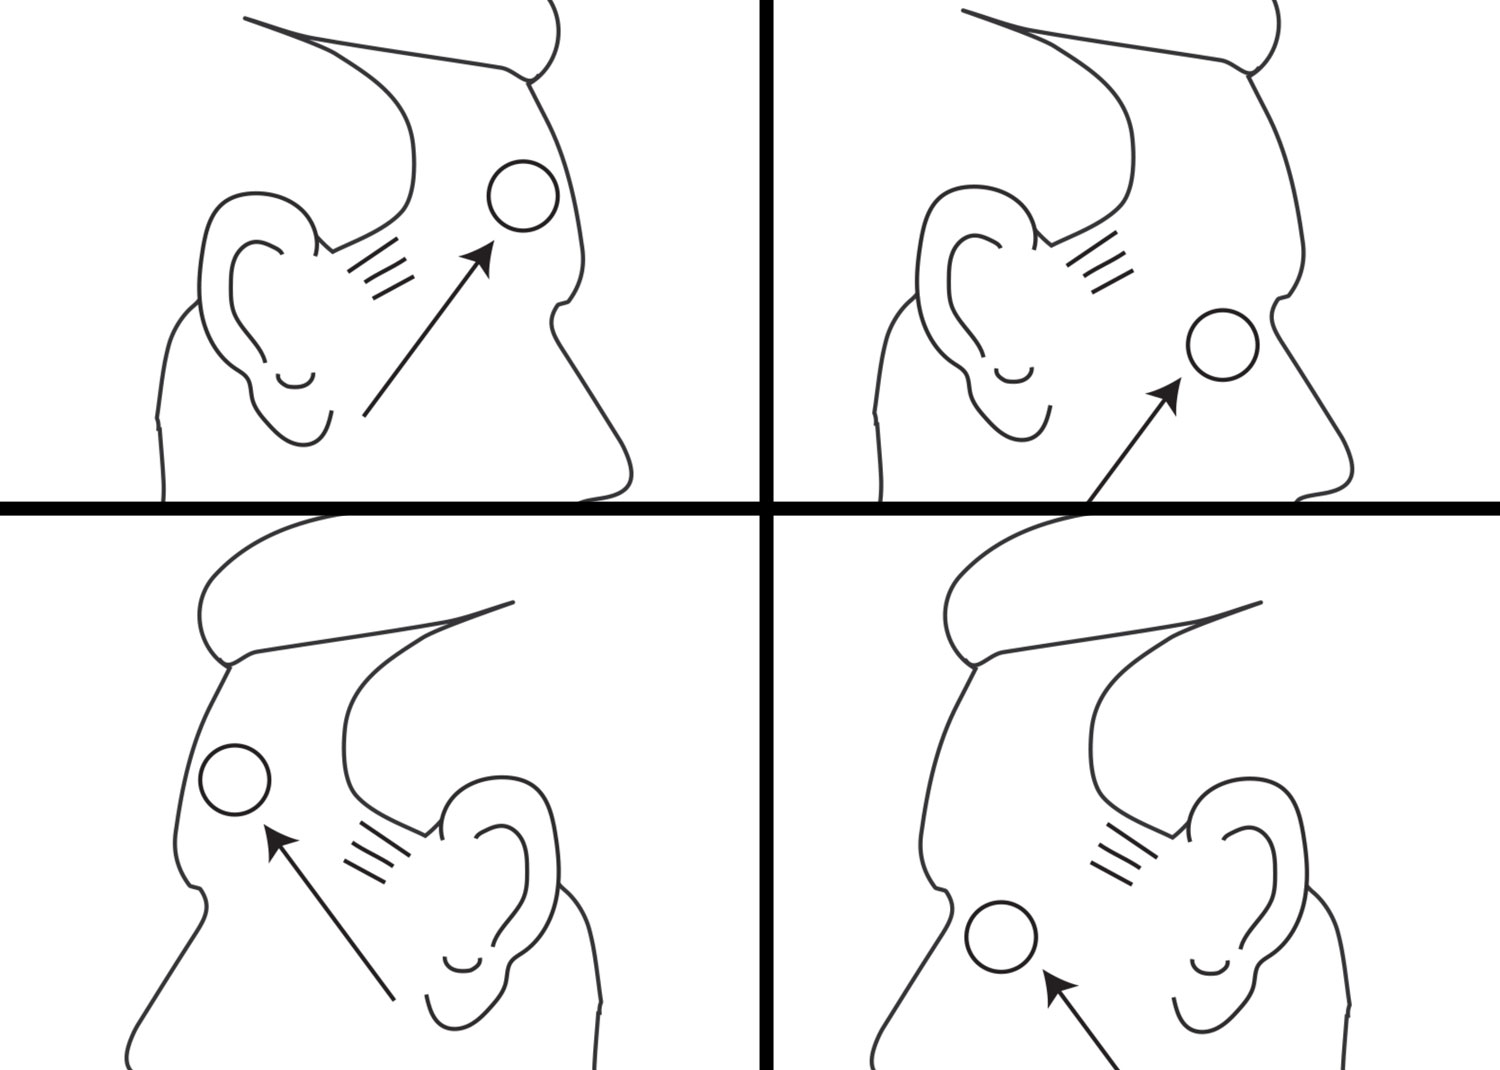
Take note of the four areas of the face to be sampled: left and right forehead areas, left and right eye (crow’s feet) areas.
6. Collect Samples
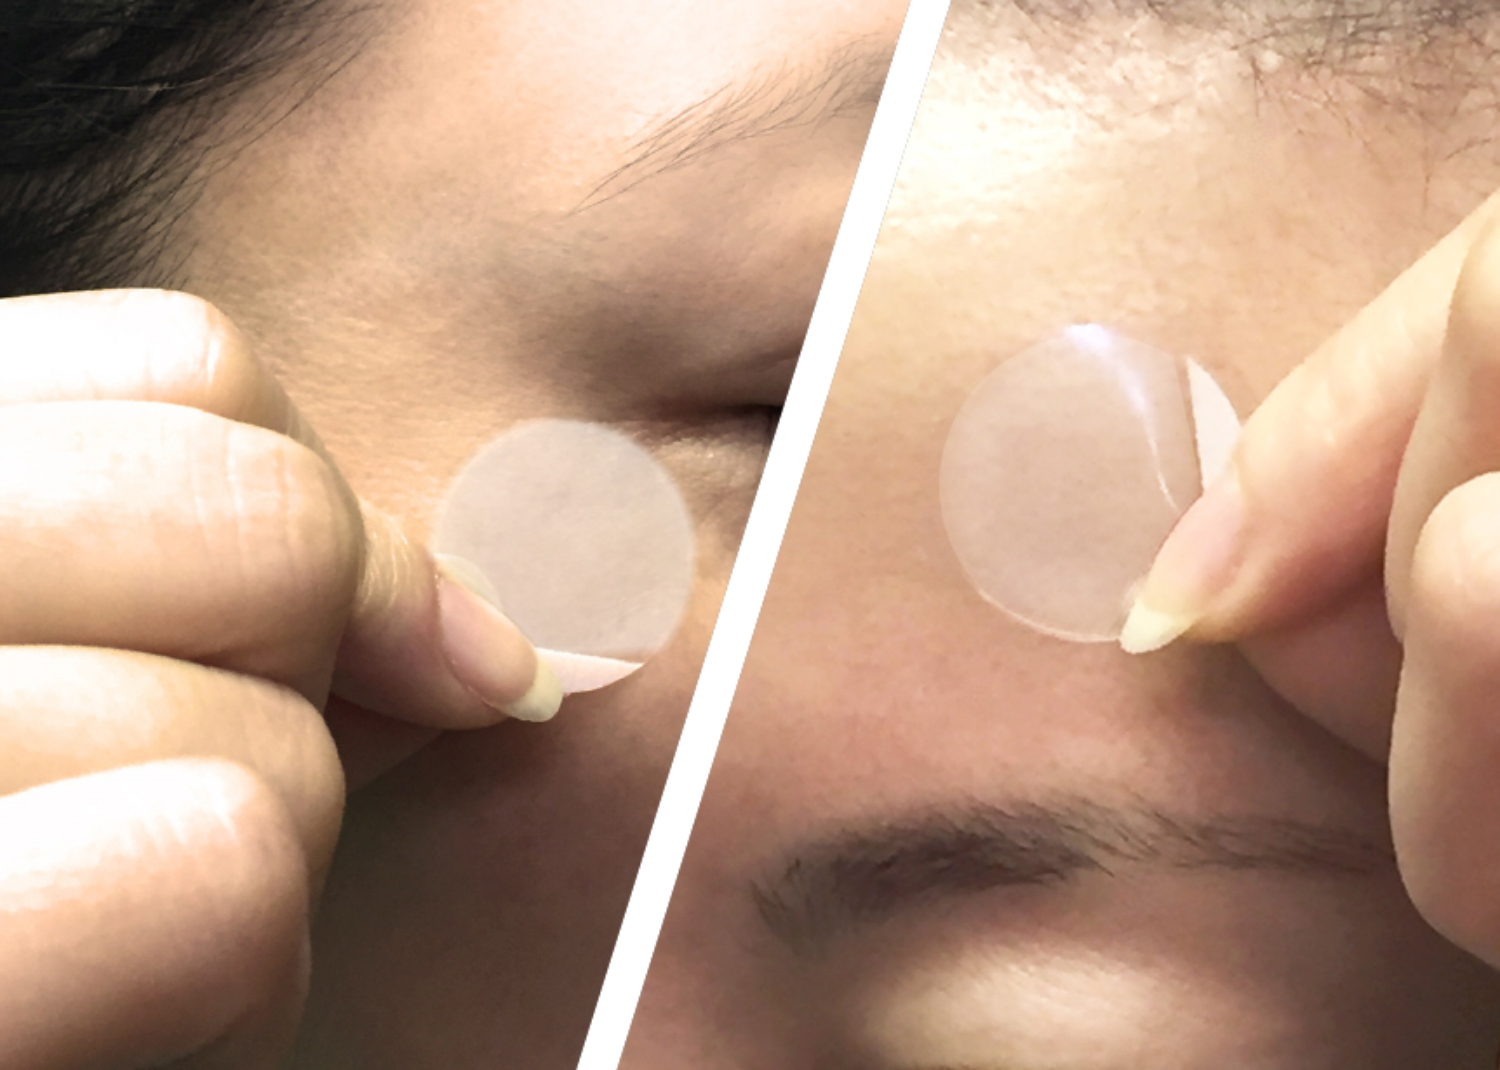
Pinch the white edge of a collection adhesive and stick each adhesive to each skin sampling area and press firmly for 2 seconds. Repeat 10 times per area until adhesive is no longer clear. Avoid sticking or contaminating the adhesives with other surfaces.
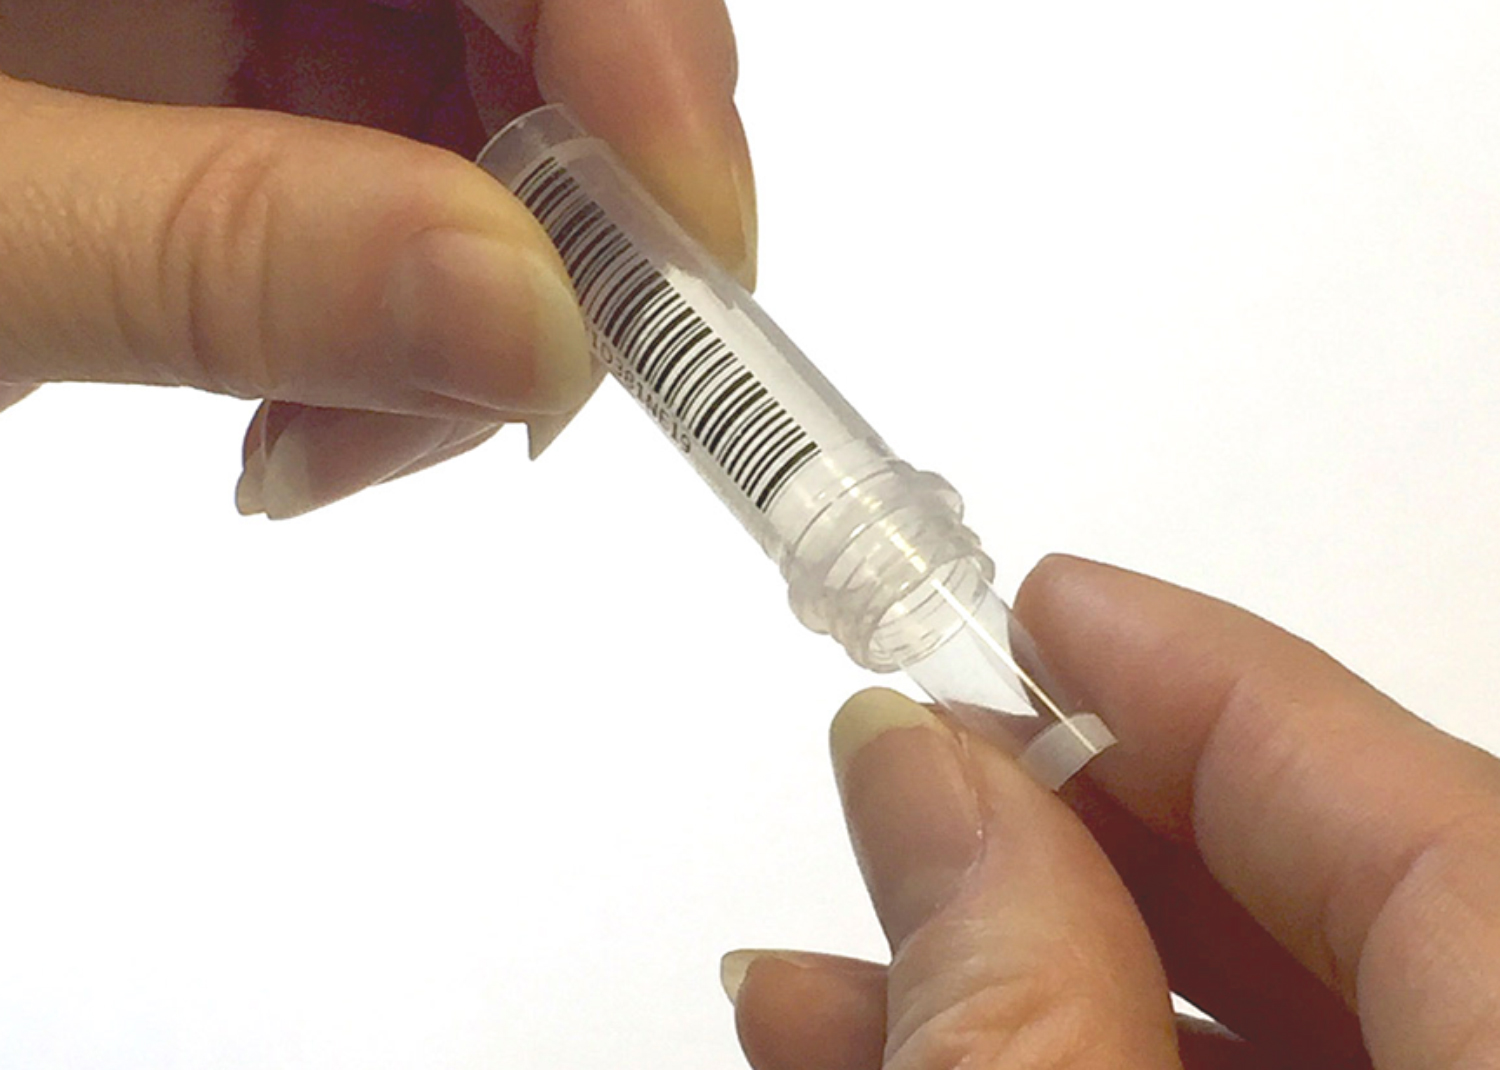
7. Place in Tubes
Carefully insert each of the 4 collection adhesives into 4 separate collection tubes. The sticky part should be facing inwards of the tube such that it does not stick to the sides. Twist to tighten the caps.
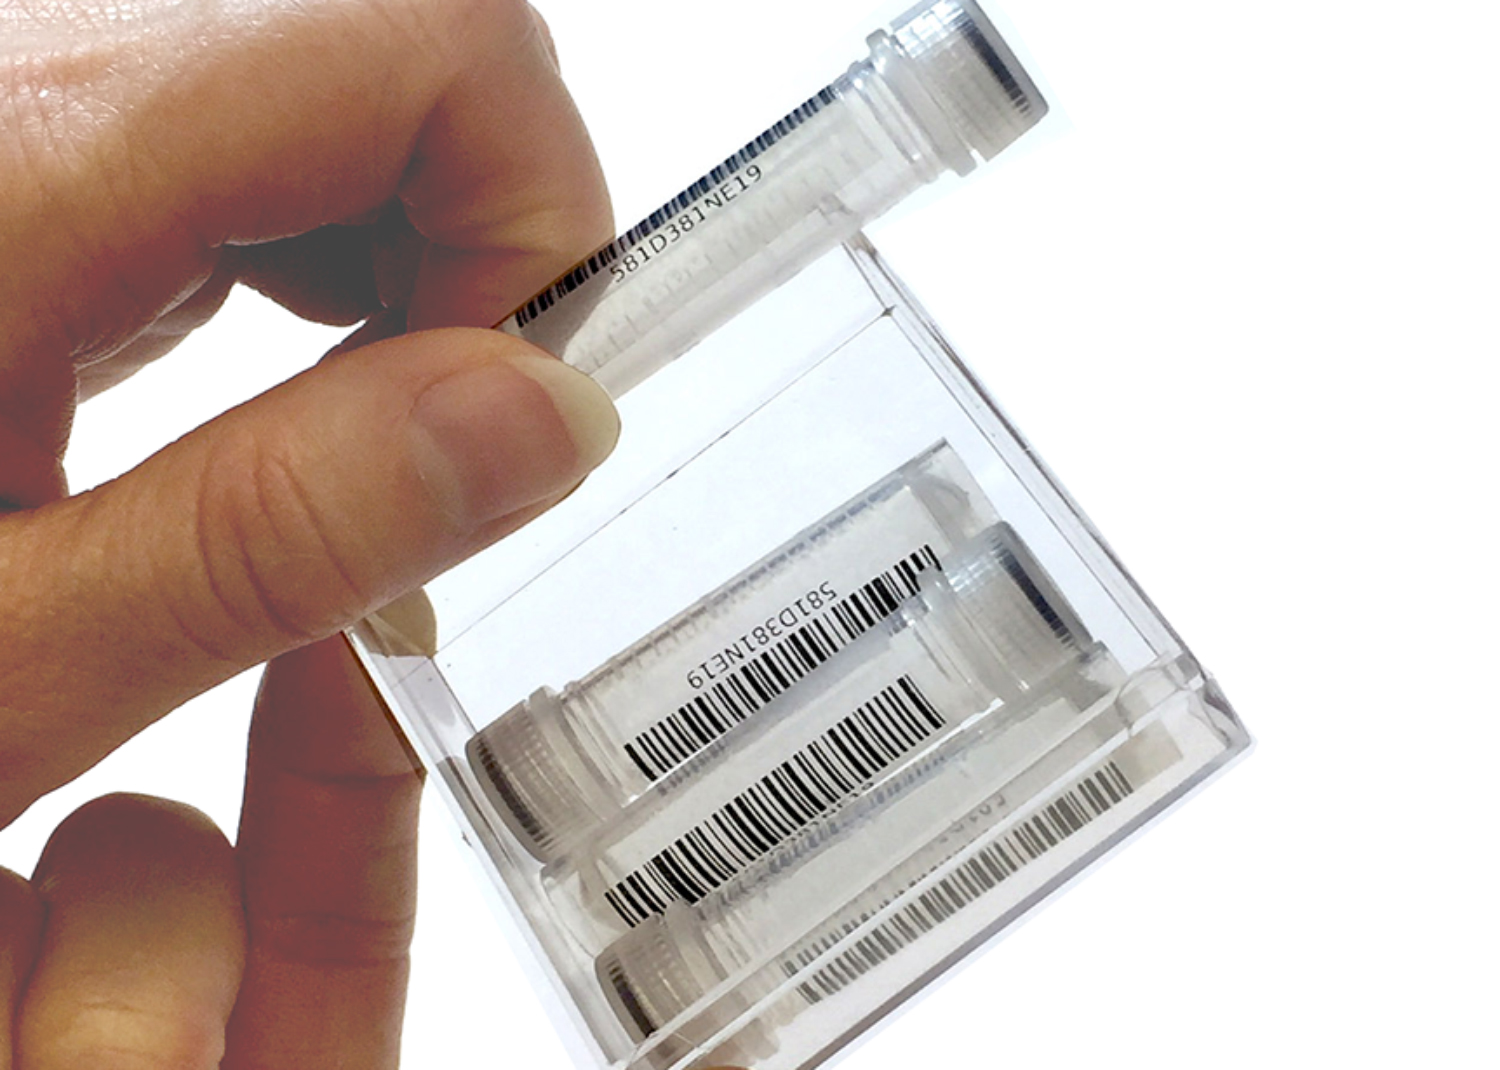
8. Place in Container
Place all capped collection tubes (with used collection adhesives inside) back into the plastic container. Firmly close the plastic lid.
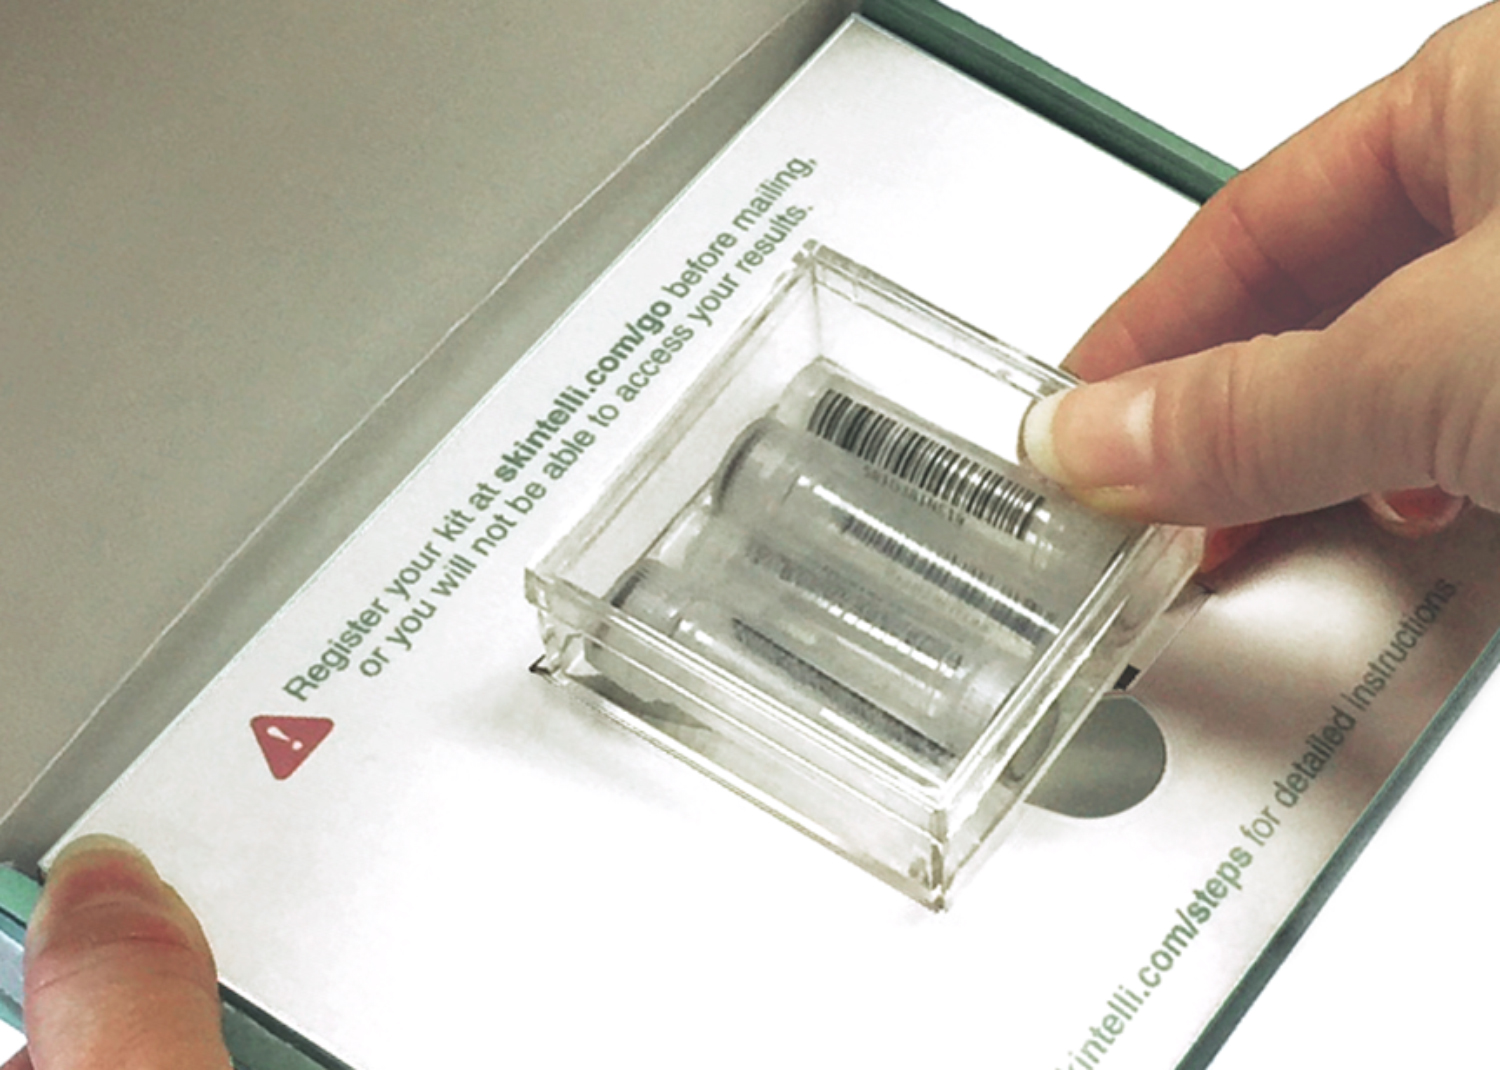
9. Return to Box
Place the plastic container (containing the capped tubes) back into the original kit box. Peel the tape strip on the inner flap of the box and press firmly down to seal the box.
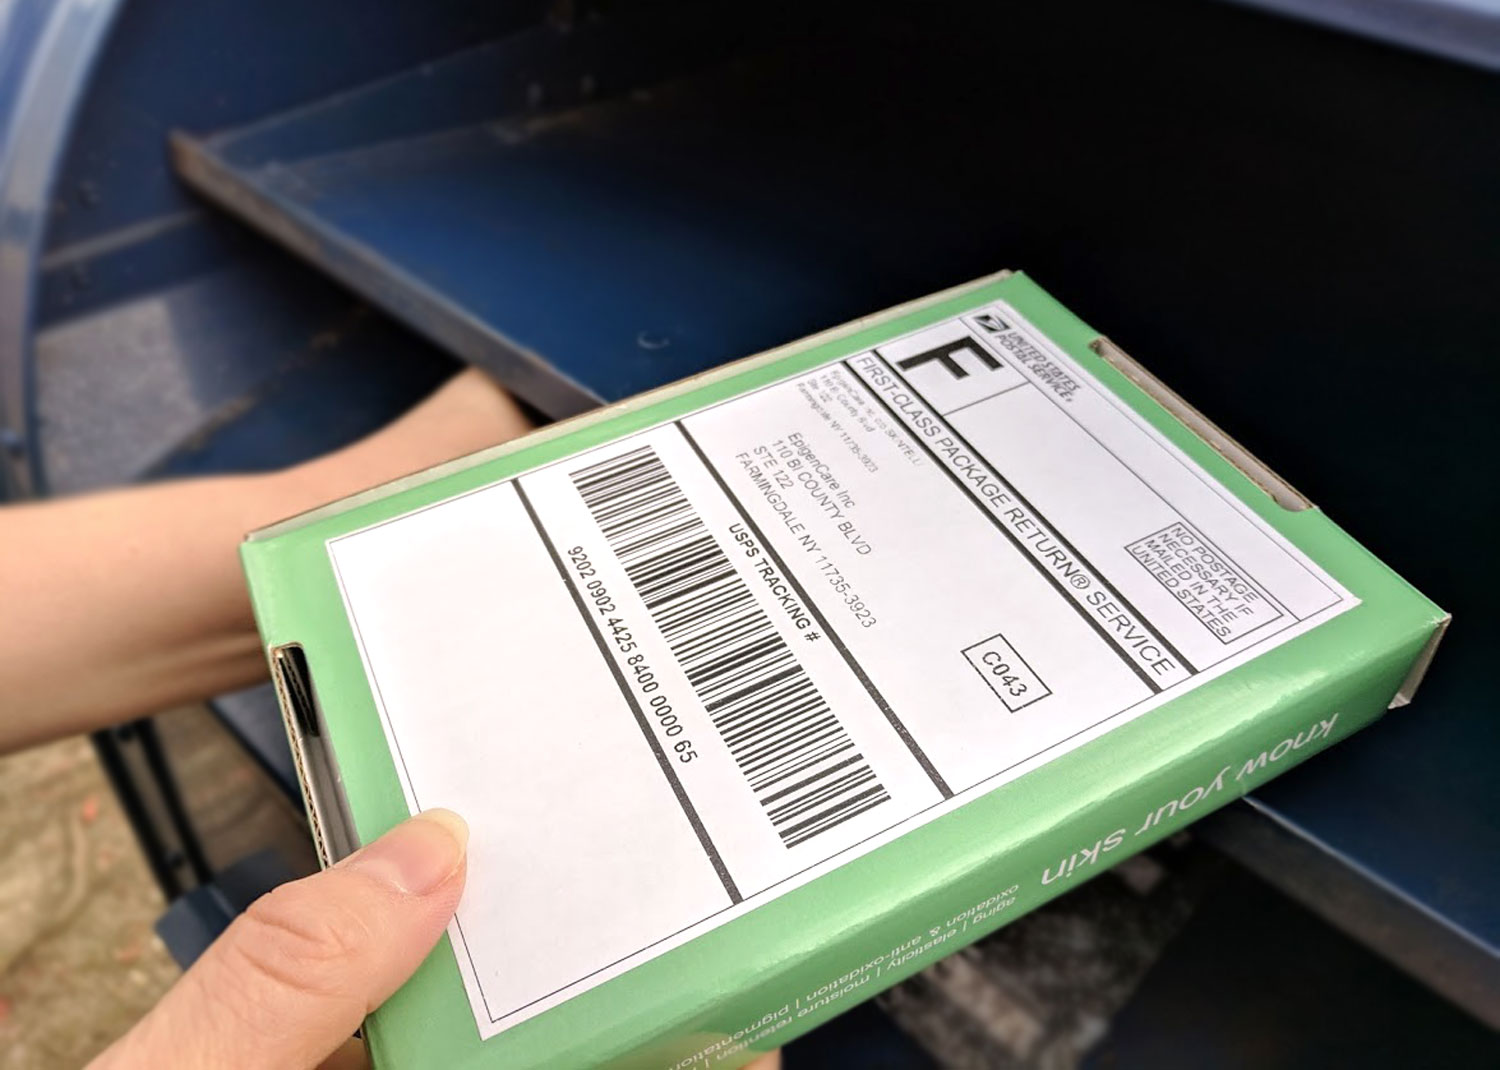
10. Mail Kit Back
Mail the sealed kit box containing the collected samples through the United States Postal Service (postage is prepaid). Do NOT place the retail sleeve back over the box and ensure the shipping label is fully visible.